Wednesday, November 24, 2010
We are the cranberries!

Cranberries are chocked full of Vitamin C & Fiber. You can use any type of sugar from refined to natural to artificial. Or if you’re serving someone who is diabetic or if you like your cranberry sauce tart, you don’t have to use any sugar at all.
Fortunately, since cranberries store and travel well the bagged berries you get from the grocery store are nearly as good as fresh picked. Look for firm berries with a dark color.
If you are canning, this is a good time to get the jars ready, so you won't be rushed later. The dishwasher is fine for the jars; or you can wash the containers in hot, soapy water and rinse, then sanitize the jars by boiling them 10 minutes, and keep the jars in hot water until they are used. Keep the jars hot to prevent them from breaking when you fill them with the hot cranberry sauce.
Put the lids into a pan of hot, but not quite boiling water (that's what the manufacturer's recommend) for 5 minutes, and use the magnetic "lid lifter wand" to pull them out.
You need two 12-ounce packages of cranberries. Wash them by swirling them around in a large bowl of cold water.

Lift them out with your hands and feel for any smooshy berries. Discard the soft ones.

Lift them out with your hands and feel for any smooshy berries. Discard the soft ones.

In a large pot, bring 2 inches of water (or cranberry or apple juice) to the boiling point and pour the cranberries in.
 Cook them for about 10 minutes; stirring once or twice (the berries will pop as they cook).

Once half the berries are popped and the sauce feels mushy, it's done! It should take 10 to 15 minutes of cooking over medium-high heat.


Once half the berries are popped and the sauce feels mushy, it's done! It should take 10 to 15 minutes of cooking over medium-high heat.

Turn off the heat. Add sugar to taste. Start out with 1 cup of sugar or honey or Splenda, as you prefer. Taste and add more if it is still too tart. If you don't plan to can sweetener then you're done! Just serve your fresh cranberry sauce warm or cold!

Cranberries are naturally high in pectin, which aids in thickening. To boost the thickening power, bloom some unflavored gelatin and combine with the sauce.
If you’re canning the sauce, it hot until you’re ready to fill the jars you will put into the canner
If you’re canning the sauce, it hot until you’re ready to fill the jars you will put into the canner

Fill the jars to within a 1/2 inch of the top, wipe any spilled cranberry sauce of the top, seat the lid and tighten the ring around them. Put them in the canner and keep them cover with at least 1 inch of water and boiling. If you are at sea level (up to 1,000 ft) boil pint jars for 15 minutes and quart jars for 20 min. If you are at an altitude of 1,000 feet or more, increase the cooking time by two minutes per 1,000 feet.


Lift the jars out of the water and let them cool without touching or bumping them in a draft-free place overnight. Check that the jars are sealed by pressing in the center, gently, with your finger. If it pops up and down (often making a popping sound), it is not sealed. If you put the jar in the refrigerator right away, you can still use it.

If you find that the end product is not as gelled or as thick as you'd like it to be, simply bring it to a boil in a saucepan, turn down the heat, and stir occasionally until it gets to a consistency you like. Let it set up in the refrigerator before serving.
If you are canning, this recipe has a shelf life of 12 months to 18 months, and requires no special attention. Which means you can make enough sauce to get you through this and next year’s holidays!
Enjoy!!!
Tuesday, November 23, 2010
A quest for clarity
In previous posts I showed you how easy it is to make and store butter. In this post I’m taking butter to a whole new level.

Clarifying butter is the process of separating the milk solids and water from the butterfat. The pure golden liquid has a different taste than regular butter but it has a more buttery flavor than other oils. The intensity of flavor of the clarified butter depends on how long you cook the melted butter. If you continue to cook the butter once it has melted and separated, the milk solids at the bottom of the saucepan will start to brown. Once the milk solids turn a golden brown color the clarified butter will take on a rich fragrant nutty flavor that is called "noisette butter"(1) because it is similar in color and flavor to hazelnuts. However, be very careful not to overheat the butter or it will become bitter tasting.
Also called drawn butter, there are many benefits of clarified butter.
It has a longer shelf life. It lasts several months longer than regular butter if kept refrigerated. Although pure clarified butter does not need to be refrigeration, it is recommended unless you’re completely certain you’ve removed all the milk fats which will cause it to go rancid.
You can use clarified butter as you would in any recipe; however, it has a higher smoke point which means that you can cook at higher temperatures than you can with regular butter. It is excellent for sautéing and can be substituted for oil for frying.
Clarified butter is much lighter an oil than nut oils, so it is easier to digest. And be cause the milk solids and proteins are removed, people with milk allergies can usually tolerate it.

To make clarified butter gently melt unsalted butter over low heat until the butter breaks down and three layers form.

The top layer is a white foam that contains the whey proteins. Theses should be skimmed off with a spoon.

The milk solids will drop to the bottom of the saucepan and form a milky layer of sediment.

What is left in the middle is a pure golden-yellow liquid called clarified butter.

When you have skimmed all the white foam from the surface of the clarified butter, and it has stopped bubbling, remove the saucepan from the heat. Let the butter sit a few minutes to allow the milk solids to further settle to the bottom, and then either pour off the liquid or strain the mixture through a fine sieve or a cheesecloth-lined strainer.

Turning up the heat will melt the butter faster, but the milk solids may begin to burn, so, resist the temptation. Instead, you can cut up the butter into pieces to speed up melting. Also, if you don't have a small saucepan, it may be best to use more butter. Too little butter in a large diameter pan will make it difficult to separate the solids from the fat later.
The smoke point of a particular oil is the temperature at which the oil begins to decompose and visible fumes (smoke) are given off. The oil begins to breakdown creating acreolein , an obnoxious-smelling compound.
The smoke point of regular butter is 350 Degrees F versus 485 Degrees F for clarified butter.
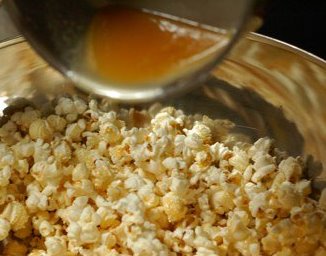
You can discard the milk solids or use them as a rich topping for popcorn.
YUM!
(1) Noisette is French for hazelnut.
Monday, November 22, 2010
Enthusiasm is the yeast that makes your hopes rise

Yeasts are fungi . . . like mushrooms only much smaller. Common baker’s yeast is the type of yeast that you are probably most familiar with, It is used to leaven bread and impart the yummy fermentation flavor and aroma.
They are gassy little creatures. If we feed them and keep them warm they reward us by producing carbon dioxide and alcohol giving us yummy, airy loaves of bread.
Yeast are temperamental and sensitve. Give them too much sugar and you will overload them and they’ll shut down. They like it nice and toasty but if they’re too hot they’ll die . . . the optimal temperature is somewhere around 95°F and 105°F.

The amount of yeast to use, the length of time to allow the yeast to grow, and the balance of other ingredients that may promote or inhibit yeast activity are all unpredictable variables when creating a recipe from scratch. It takes a lot of trial and error to produce a recipe with accurate rise times for a particular amount of yeast (doubling yeast in a recipe won't allow you to halve the rise time) so it's best to start off by sticking with the amounts and times printed in a recipe before experimenting.
There are three different types of yeast you can purchase commercially . . . fresh, instant and active dry.
Fresh Yeast, also known as compressed or cake yeast, is active yeast. It has good rising qualities and produces excellent-tasting bread, croissants and Danish pastries. It is sold in tiny cakes in the refrigerated section of many supermarkets. Fresh yeast does not keep well; it will last about two weeks if refrigerated. The yeast should be pale gray-brown, fragrant, soft and crumbly, not hard, dark brown and crusty. Any mold growing on the surface is an indication that the yeast should be discarded. Fresh yeast should be proofed in tepid water (80-90 degrees F) without contact with salt or sugar. This yeast type is a good choice for breads requiring a long cool rise, or for breads made using the sponge method.
Instant Yeast is a dry yeast. It comes in smaller granules than active dry yeast, absorbs liquid rapidly, and doesn't need to be hydrated or "proofed" before being mixed into flour. Less rising time is required, allowing home bakers to bake a loaf of bread fairly quickly. To develop more flavor--such as for artisan-style breads--a long, slow fermentation is best: store the shaped loaves overnight in the refrigerator before bringing to room temperature and to a full rise. Store instant yeast in a cool dry place, or in the refrigerator once the package has been opened. Do not use yeast after the expiration date.
My preference is:
Active Dry Yeast is the most commonly available form for home bakers. It is available in ¼-oz packets or jars. The yeast is dormant, and is best used after proofing and rehydrating. Sprinkle the yeast over warm water (105-115 degrees F) and a pinch of sugar, and let it stand for 10 minutes until creamy and bubbly. It can be stored in a cool dry place and in unopened packages for up to 15 months, but do not use it after the expiration date. Store open containers in the refrigerator.
This one of my favorite recipes for making nice sandwich bread. It’s fairly foolproof as long as you follow the instructions.
What you need:
· 2 Cups Warm Water (110 Degrees)
· 2/3 Cups White Sugar
· 1 1/2 Tablespoons Active Dry Yeast
· 1 1/2 Teaspoons Salt
· 1/4 Cup Vegetable Oil
· 6 Cups Bread Flour

Using a large bowl, dissolve the sugar in the warm water. After the sugar is dissolved, stir in the yeast, and allow the mixture to proof(1) until yeast resembles a creamy foam.

Pour the yeast mixture into a mixing bowl.

Into the yeast mixture, add the salt and the oil.

If you’re using a mixer – Mix on low speed with the dough hook, gradually mix in the flour, only one cup at a time. Once all the flour is incorporated, turn the mixer up to medium speed for about 5 minutes, until the dough is smooth and satiny.

If you’re mixing by hand - Gradually mix in the flour, only one cup at a time. On a lightly floured surface, knead the dough until smooth.

Place in a well oiled bowl, turning the dough to coat. Cover the bowl with a damp cloth and allow to rise until doubled in bulk. This usually takes about one hour.

After the dough has finished rising, knead for a few minutes, and divide in half. Shape each piece of dough into loaf shape, and place into two well oiled 9 by 5 inch loaf pans. Allow the dough to rise for thirty more minutes, or until dough has risen about one inch above the pans.

Bake the loaves at 350 degrees for about thirty minutes, until golden brown on top.


(1) Proofing yeast - Yeast needs to multiply and grow in a sympathetic environment. The correct environment includes moisture, food (in the form of sugar or starch), and a warm, nurturing temperature. However, if the yeast you have in your cupboard is dead, no amount of environment will help it become a productive leavening agent. Whenever you intend to bake with active dry yeast, it is a good idea to test to make sure the yeast is alive. The act of testing to see if yeast is alive is called proofing. (Proofing rapid rise or instant yeast is not recommended.)
To proof the yeast and make sure it's active, add one packet active dry yeast to 1/4 c. warm water (between 110 and 115 degrees F) and stir to dissolve. (The water should feel like a pleasantly warm shower, or about the temperature you'd use for a baby's bottle. If it feels uncomfortably hot, it will probably kill the yeast.) Add one teaspoon of sugar and let the yeast sit for five minutes. If the yeast is foamy and smells like bread, it's active.
Sunday, November 21, 2010
Snapshot Sunday - Seecamp

Seecamp LWS 32
Shiny
Compact
Sexy
Personal Protection


 |
| Seecamp LWS32 in my hand |
 |
| Seecamp LWS32 in my husband's hand |


Subscribe to:
Posts (Atom)